

How to Enable NTFS Writing Capabilities on Mac OS X
If you've always tried transferring files between a estimator running Windows and one running Mac OS 10, chances are you've faced the problems arising due to NTFS and Fatty formats. Windows, by default prefers using NTFS formats on it's drives, and if you have formatted external hard disks and pen drives on Windows, you lot most probably accept used NTFS to format those.
That's all well and good in the Windows universe, but switch over to a Mac and you'll notice how OS Ten tin read those NTFS formatted disks just not write anything to them. That'due south one of the biggest problems in cross platform compatibility for external data storage between Windows and Os X.
What We Can Do
The most mutual solution you'll hear to this is to format drives in Fat. While this works, we'll give y'all two reasons why you might not want to do this:
- Your disk might already comprise valuable data that volition exist lost if you format information technology into FAT.
- You might need to transfer files larger than 4GB into your disk, and Fatty doesn't allow this.
And then, how to bridge this glaring gap between Windows and OS X?
Nosotros explore the possible solutions to this problem today. Withal, before you can understand what to do, you need to understand what it is that you lot are trying to fix. A little background is in order:
NTFS and FAT are ii of the most usually used file systems to format drives. These are abbreviations for New Technology File Organisation and File Allocation Table, respectively. These formats govern how disks arrange information.
Using Fat can actually fix most of your problems with using the same external storage between Windows and Mac, however, at that place'southward the caveat that files larger than 4GB tin can not be stored inside disks formatted using Fat.
How to Enable NTFS Write Capabilities on Bone X
OS 10 natively supports reading capabilities for disks in the NTFS format. This means that yous can use your NTFS formatted disks with Bone X to read files from. However, yous tin can not transfer files from your Mac to the deejay in question.
And so, y'all're flummoxed? Don't worry, we have the prepare, and we are going to explain it to you. As it turns out, there are two possible solutions to this problem.
i. Third Party Applications
Obviously you were non the first to see these limitations, so problem solvers have come out with solutions in the form of tertiary party apps. These come up in both paid and free variations, but earlier you skip ahead to the gratuitous section, be warned, the free one takes a lot more than hard work and is generally not equally reliable as the paid ones.
Paid Applications
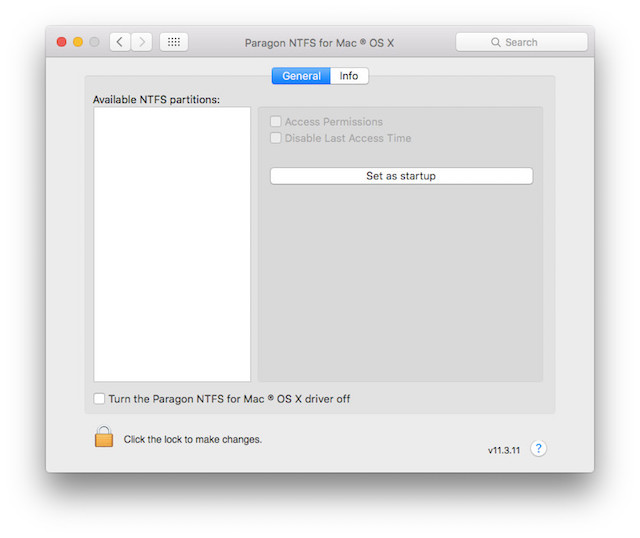
The awesome people at Paragon Software Group and Tuxera have created utilities that span the NTFS gap between Windows and Bone 10.
All you need to do with these apps is download them (and install, plain.) and you're all fix. Well, almost. You do need to restart your computer for the changes to take outcome, and so you can freely read/write on NTFS drives without any hassle.
"Paragon NTFS for Mac" is priced at $19.95 and has a 10 day trial if you want to be sure that it works out for y'all.
"Tuxera NTFS for Mac" is priced at $31 and has a 15 day trial.
Both of these apps come with the added functionality that allows you to format a drive using NTFS or create partitions. Nosotros have tried Paragon'southward offering and it's well worth the toll.
As well, notation that if yous're using a Seagate drive, Seagate offers a complimentary license for "Paragon NTFS for Mac", with the limitation that it merely works with Seagate drives, or with drives that are manufactured by Seagate. I could use it with a Samsung external Hd that was manufactured past Seagate.
Cheque out Paragon and Tuxera for an easy, hassle free NTFS experience on your Mac.
Free Applications
"osxfuse" is an open source application hosted on GitHub that also allows users to write to NTFS drives on Mac. The procedure is tediously long, and not recommended if you're non comfortable with using the Last, or rebooting your Mac into recovery way.
Nevertheless, we accept outlined the steps here.
one. Download osxfuse and install it.
2. Download Homebrew (a command line package managing director for Mac), if yous don't have it already.
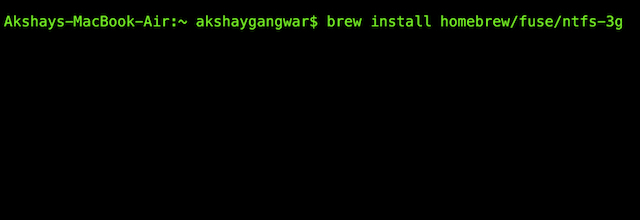
3. Open Terminal, and type the following command:
brew install homebrew/fuse/ntfs-3g
4. At present, you'll have to disable Organization Integrity Protection (SIP, or "rootless"). To do this, you lot demand to reboot into recovery mode.
- Plough your Mac off and press Control + R while starting it up again. This volition kick up your Mac in a recovery environment.
5. Launch Terminal and blazon the following control:
csrutil disable
- This volition disable System Integrity Protection on your Mac.
- Reboot your Mac commonly.
6. Open up Terminal and blazon the following commands:
sudo mv /sbin/mount_ntfs /sbin/mount_ntfs.original
            sudo ln -due south /usr/local/sbin/mount_ntfs /sbin/mount_ntfs
7. Next, you to re-enable System Integrity Protection.
- Reboot your Mac into recovery.
viii. Launch Terminal and type the post-obit command:
csrutil enable
- This will enable System Integrity Protection on your Mac.
nine. Reboot your Mac.
10. NTFS should now exist working on your Mac.
Ok, that was a lot of work to do. Peculiarly, considering how there are much simpler and easier methods available. Also, disabling Arrangement Integrity Protection is non something that should be done lightly as it allows root programs to access protected files on your Mac and might make your Mac an easy target for malware, or lead to corruption in your startup disk.
ii. Apple's Experimental Feature
Every bit information technology turns out, Apple themselves have an experimental feature that can be enabled to permit NTFS writing adequacy on the Mac. This method also requires the apply of control line, just information technology does not require y'all to disable Organisation Integrity Protection.
Note: Being an experimental feature, this might not work well, information technology might decadent your data, your disk, or cause data loss. Go on with caution, and at your own take a chance.
The steps yous need to take, in order to enable this feature are given below:
1. Fire up Last on your Mac.
ii. Type the following command:
sudo nano /etc/fstab
- You lot need to add the following line to the file:
LABEL=DRIVE_NAME none ntfs rw,auto,nobrowse
- Replace the DRIVE_NAME with the proper name of your disk.
- Make sure the DRIVE_NAME you are using does non contain any spaces as this might crusade issues.
three. This will enable write support for your bulldoze.
If your drive has a circuitous name with spaces and the like, yous tin use the device UUID to enable write support for that drive equally well. To find the UUID for your disk, you need to run the following command on the Terminal:
diskutil info /Volumes/DRIVENAME | grep UUID
Supersede the "DRIVENAME" with the name of your disk.
Once y'all have the UUID for your disk, y'all need to follow these steps:
i. Open Terminal on your Mac
- Blazon the post-obit command:
sudo nano /etc/fstab
- Add the following line to the file:
UUID=DEVICEUUID none ntfs rw,auto,nobrowse
- Supervene upon "DEVICEUUID" with the UUID for your deejay.
The limitation with this experimental method, is exactly that; information technology'south experimental. There is no guarantee that it will work properly. It might corrupt your data, or even corrupt your entire disk. Also, this method requires you to add ane line "per disk" for it to piece of work. And then if yous have more than ane disk that y'all want to write to using this method, it'll be unnecessarily tedious.
Future Possibilities
The fact that Apple has an experimental feature to enable writing capabilities for NTFS disks hints a little flake at a possible native support for NTFS writing. That is good news, but information technology is likewise unconfirmed. For all nosotros know, Apple tree might completely remove NTFS writing support from the Os, leaving users with no option simply to utilise third political party applications.
If you lot have the choice, we suggest that you format your disks using exFAT. exFAT is a format that is supported by both Windows and Os X and it does not have the 4GB file size restriction that Fatty does.
However, like nigh everything in applied science, exFAT too has a caveat in that it might non be supported by older versions of Os X and by Windows machines running Windows XP and older. This means that if you lot constantly find yourself sitting in front of a reckoner running Windows XP or older, and so exFAT is not the all-time choice for you as information technology might non fifty-fifty get detected past the older operating systems.
SEE ALSO: How to Format USB Drive on Mac
Start Using NTFS on Your Mac
Y'all have been armed with the essential knowledge that y'all need in order to make writing to NTFS files on your Mac a reality. Endeavor out the methods we have outlined in this article and let us know about your experience with the tools you utilize to accomplish these results on your computers.
Make certain you lot create backups of important information before trying out things that you are non entirely sure about. Better safe than sorry.
Allow u.s. know about your feel with NTFS on Mac in the comments below.

Source: https://beebom.com/how-enable-ntfs-writing-mac/
Posted by: dwyeralwask.blogspot.com
0 Response to "How to Enable NTFS Writing Capabilities on Mac OS X"
Post a Comment